
Asennat Ethernet Adapter for Starlink Mini can feel confusing at first, especially if you’re switching from Wi-Fi to a wired setup. Don’t worry — this complete step-by-step guide will walk you through everything in simple, easy-to-follow instructions. We’ll also cover troubleshooting tips and answer common questions so you get the fastest, most stable connection possible.

1. Why Use an Ethernet Adapter for Starlink Mini
Before diving into how to install Ethernet Adapter Starlink Mini, it’s important to understand why you need one. Starlink Mini doesn’t have a built-in RJ45 port, so the adapter adds wired connectivity for faster, more stable internet.
Tärkeimmät edut:
- Stronger Stability – Avoid Wi-Fi drops and enjoy uninterrupted connections.
- Lower Latency – Perfect for gaming, video calls, and real-time streaming.
- Nopeammat nopeudet – Supports gigabit Ethernet for maximum performance.
- Direct Device Connection – Easily link your PC, TV, gaming console, or router.

2. What You Need Before Installation
To install the Ethernet Adapter for Starlink Mini, prepare the following items:
- Starlink Mini dish
- Ethernet Splitter & PoE Injector (compatible model)
- RJ45 CAT8/CAT6 Ethernet cable
- Power supply (12V/15A DC adapter)
- Compatible router or PC
Kärki: Make sure your adapter is compatible with Starlink Mini only — it won’t work with Gen 2, Gen 3 Kickstand, or High-Performance models.
3. Step-by-Step Installation Guide
Follow these simple steps to complete the setup. The included product images make it even easier.
3.1 Connect the Ethernet Cable
- Take the CAT8 Ethernet cable and insert it into the RJ45 port on the adapter.
- Make sure it clicks into place securely.
3.2 Attach the Waterproof Seal
- Slide the silicone sealing ring onto the cable.
- Twist the waterproof cover tightly to ensure an IP68-rated seal.
- This protects against rain, snow, and dust.
3.3 Connect the Adapter to Starlink Mini
- Insert the adapter’s proprietary plug into your Starlink Mini dish port.
- Double-check that the connection is firm.
3.4 Attach the Power Supply
- Connect the power cable from the PoE injector to your DC power source (12V or 48V step-up converter).
- The injector sends both voima ja data via a single cable, simplifying the setup.

3.5 Connect to Your Device
- Plug the other end of the Ethernet cable into your PC, gaming console, or external router.
- If using a router, ensure bypass mode is configured in the Starlink app.
4. Tips for Faster and Safer Setup
- Always secure the silicone sealing rings tightly to keep your adapter waterproof.
- Avoid using low-quality Ethernet cables, as they may cause speed drops.
- Place your adapter in a well-ventilated area to prevent overheating.
- Use surge protection to protect your system from unexpected power spikes.
5. Common Issues and Troubleshooting
Even with the correct setup, some users face issues when installing the Ethernet Adapter for Starlink Mini. Here are common problems and solutions:

5.1 Adapter Not Detected
- Check cable orientation and ensure the RJ45 connector is fully inserted.
- Use only Starlink-certified adapters for guaranteed compatibility.
5.2 Slow Internet Speeds
- Replace older CAT5 cables with CAT6 or CAT8 Ethernet cables.
- Confirm that you’re connected directly to the PoE injector instead of Wi-Fi.
5.3 No Power to Starlink Dish
- Verify that the power supply is delivering 12V–48V output.
- Check for loose connections in the PoE injector and DC adapter.
5.4 Water Damage
- Make sure all waterproof seals are properly tightened.
- Inspect for cracks in the adapter housing after exposure to extreme weather.
6. Compatibility Check

Before you buy, confirm that your Starlink Mini system supports the adapter:
| Starlink Terminal Model | Compatible |
|---|---|
| Starlink Mini Dishy | ✅ Kyllä |
| Gen 2 Standard Actuated | ❌ No |
| Gen 3 Kickstand (Rev4) | ❌ No |
| High-Performance Models | ❌ No |
| Enterprise Dishy (V4) | ❌ No |
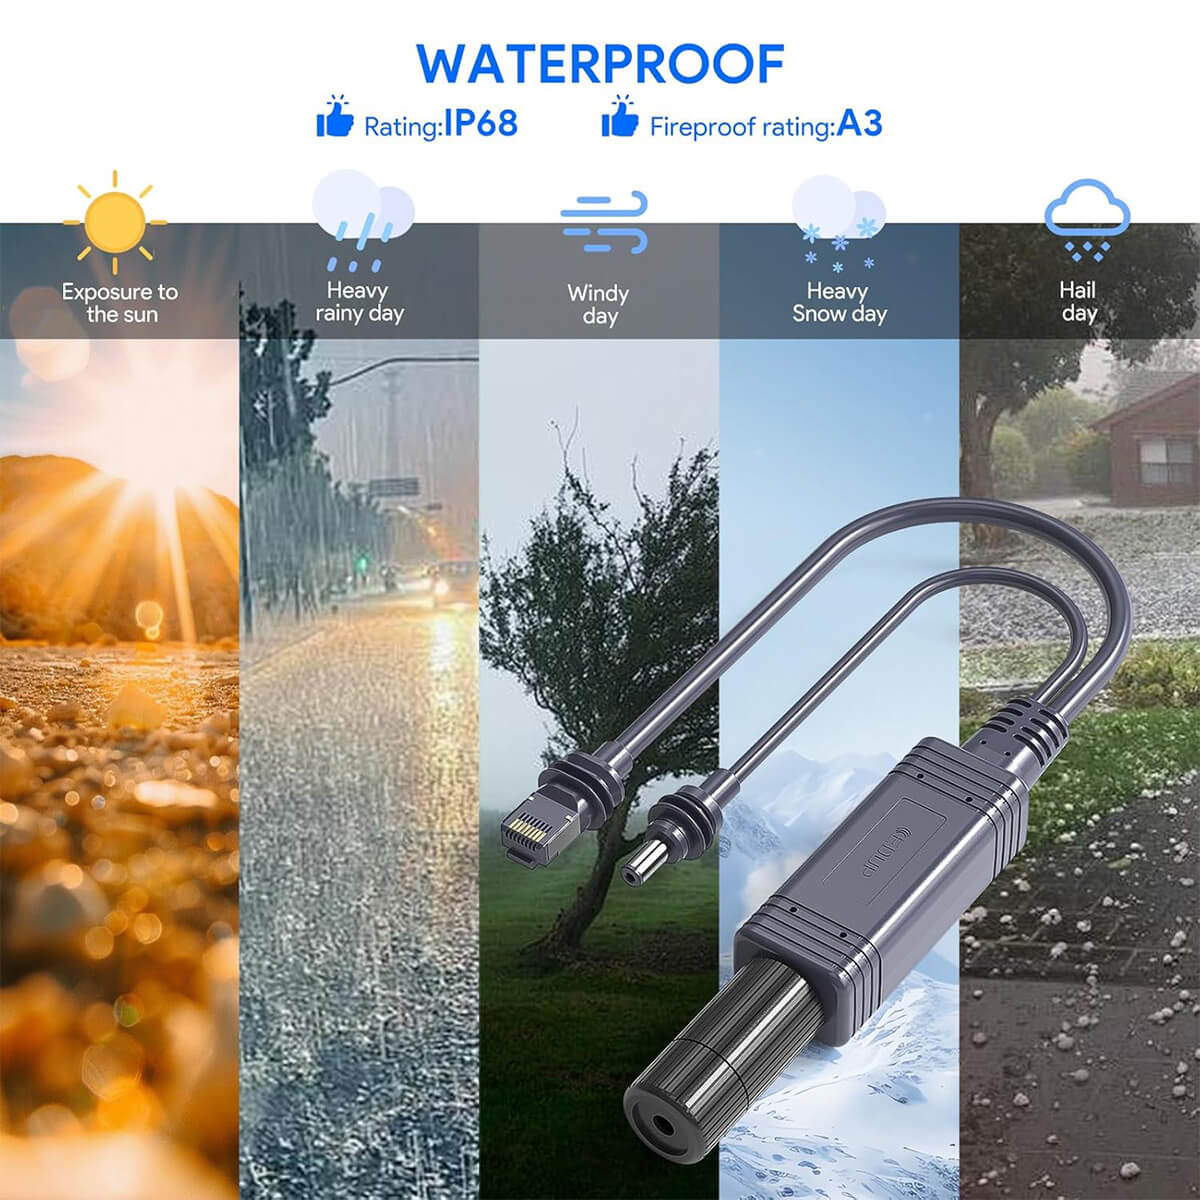
7. Safety and Waterproofing Features
The Ethernet Adapter for Starlink Mini is designed for outdoor use. It’s rated IP68 waterproof ja A3 fireproof, making it suitable for all weather conditions:
- Rain or Snow – Protected from water damage.
- Extreme Heat or Cold – Operates between -25°C and +70°C.
- Dust & Debris – Sealed to prevent interference.
This ensures a reliable connection whether you’re at home, in a remote cabin, or on an RV trip.
8. FAQs About Ethernet Adapter Starlink Mini

Q1: Can I connect multiple devices?
Yes. The RJ45 port supports up to 4 Ethernet connections when using an extender.
Q2: Does it improve speed compared to Wi-Fi?
Absolutely. Wired connections using this adapter typically provide 10–30% better speed and lower latency.
Q3: Will this work with my Starlink router?
Yes, but if you’re connecting your own router, enable Bypass Mode in the Starlink app.
Q4: Can I use it for gaming or streaming?
Yes, the adapter delivers gigabit speeds for smooth streaming and lag-free gaming.
Q5: Is installation beginner-friendly?
Yes. With the included waterproof seal and simple plug-and-play design, setup is quick and easy.
9. Common Installation Mistakes to Avoid

Many users face issues due to incorrect installation. Here are frequent mistakes and solutions:
- Not tightening the waterproof seal → Always ensure the silicone rings are firmly secured.
- Using incompatible Ethernet cables → Stick to Starlink-certified CAT6/CAT8 cables for stability.
- Skipping the power check → Confirm your PoE injector delivers at least 12V–48V before connecting.
- Improper router setup → If you’re connecting a third-party router, enable Bypass Mode via the Starlink app.
10. Advanced Setup Options
If you plan to expand your home or office network, the Starlink Mini Ethernet Adapter allows you to:
- Connect multiple devices using an Ethernet switch.
- Combine Starlink with mesh Wi-Fi systems for better whole-home coverage.
- Use wired backhaul for faster speeds ja lower latency on streaming and gaming setups.
- Set up static IP addresses tai VPN routers for secure enterprise-level configurations.
In addition, the adapter is built with IP68 waterproofing and A3 fireproof protection, ensuring reliable performance in extreme environments such as heavy rain, snow, or high heat.
Johtopäätös
Learning how to install Ethernet Adapter Starlink Mini is simple when you follow the right steps. By setting it up correctly, you get faster speeds, better stability, and a more reliable wired connection — perfect for streaming, gaming, or working from home.
Using the PoE injector and waterproof seals ensures your setup is protected in all weather conditions. Whether you’re a beginner or tech-savvy, this adapter unlocks the full potential of your Starlink Mini.
If you want a stable, high-speed, and secure Starlink experience, upgrading with the Ethernet Adapter is the smartest choice.